I am back from Ladakh but not yet ready to start posting on the trip. In the meantime, I will post technical articles I have already published for the Canberra Photographic Society Blog .:
- Computers for Photography
- Why Print?
- What do you need for Printing?
- How to Print
- Lightroom Previews and Getting Lightroom to Fly
- New Auto Changes in Lightroom
- Backup for Photographers
Following this, I will start posting on the trip to Ladakh, then the Atacama (2015), then the Caribbean (2016).
How to Print
Introduction
Printing is the primary vehicle for creating photographic art. In our digital age photographic printing is both more readily available and more capable of high quality than ever before. The most popular methods involve Lightroom and an Epson printer so that is what I will cover here.
Lightroom is the world’s most popular photo editing program with a simple interface that is easy to understand. My focus here is merely on printing. For more information on Lightroom there are many videos on the web including:
- Julianne Kost .: Many free videos from Adobe
- Luminous Landscape .: A systematic set of videos. You need to be willing to pay an annual $US12 for access to the site.
People who use Photoshop or non-Epson printers will still find this post relevant though some details will differ.
Soft Proofing
Soft proofing means simulating on your screen how the image will appear as a print on a particular paper. The most important prerequisite to make this possible is to calibrate your monitor with a good colorimeter. A colorimeter is a small device that reads colours and densities as it sits on your screen. It then delivers a monitor that shows your images with accurate colours and tonalities.
If you don’t have a profiled monitor, there’s no point trying to soft proof because your monitor won’t be able to display accurate colour. It may look accurate to you but our eyes and our brain are very good at making lighting appear neutral even when it is far from that. Tungsten light (old-style lightbulbs), fluorescent light and daylight, for example. In this case, you can still print but there will be a greater difference between your monitor and a default print. Probably you will end up spending much more time and money in paper for testing and your print quality may not be as good.
It helps to have a good monitor and it helps to have a good colorimeter (such as an X-Rite i1 Display Pro). It is also an advantage to have a wide gamut monitor (with an aRGB gamut rather than an sRGB gamut). No matter, you can work with whatever you have as long as your monitor is profiled with a reasonably good colorimeter.
OK, you have selected an image to print and you have a profiled monitor so we’ll go to the Develop Module in Lightroom for soft proofing…
.
 .
.
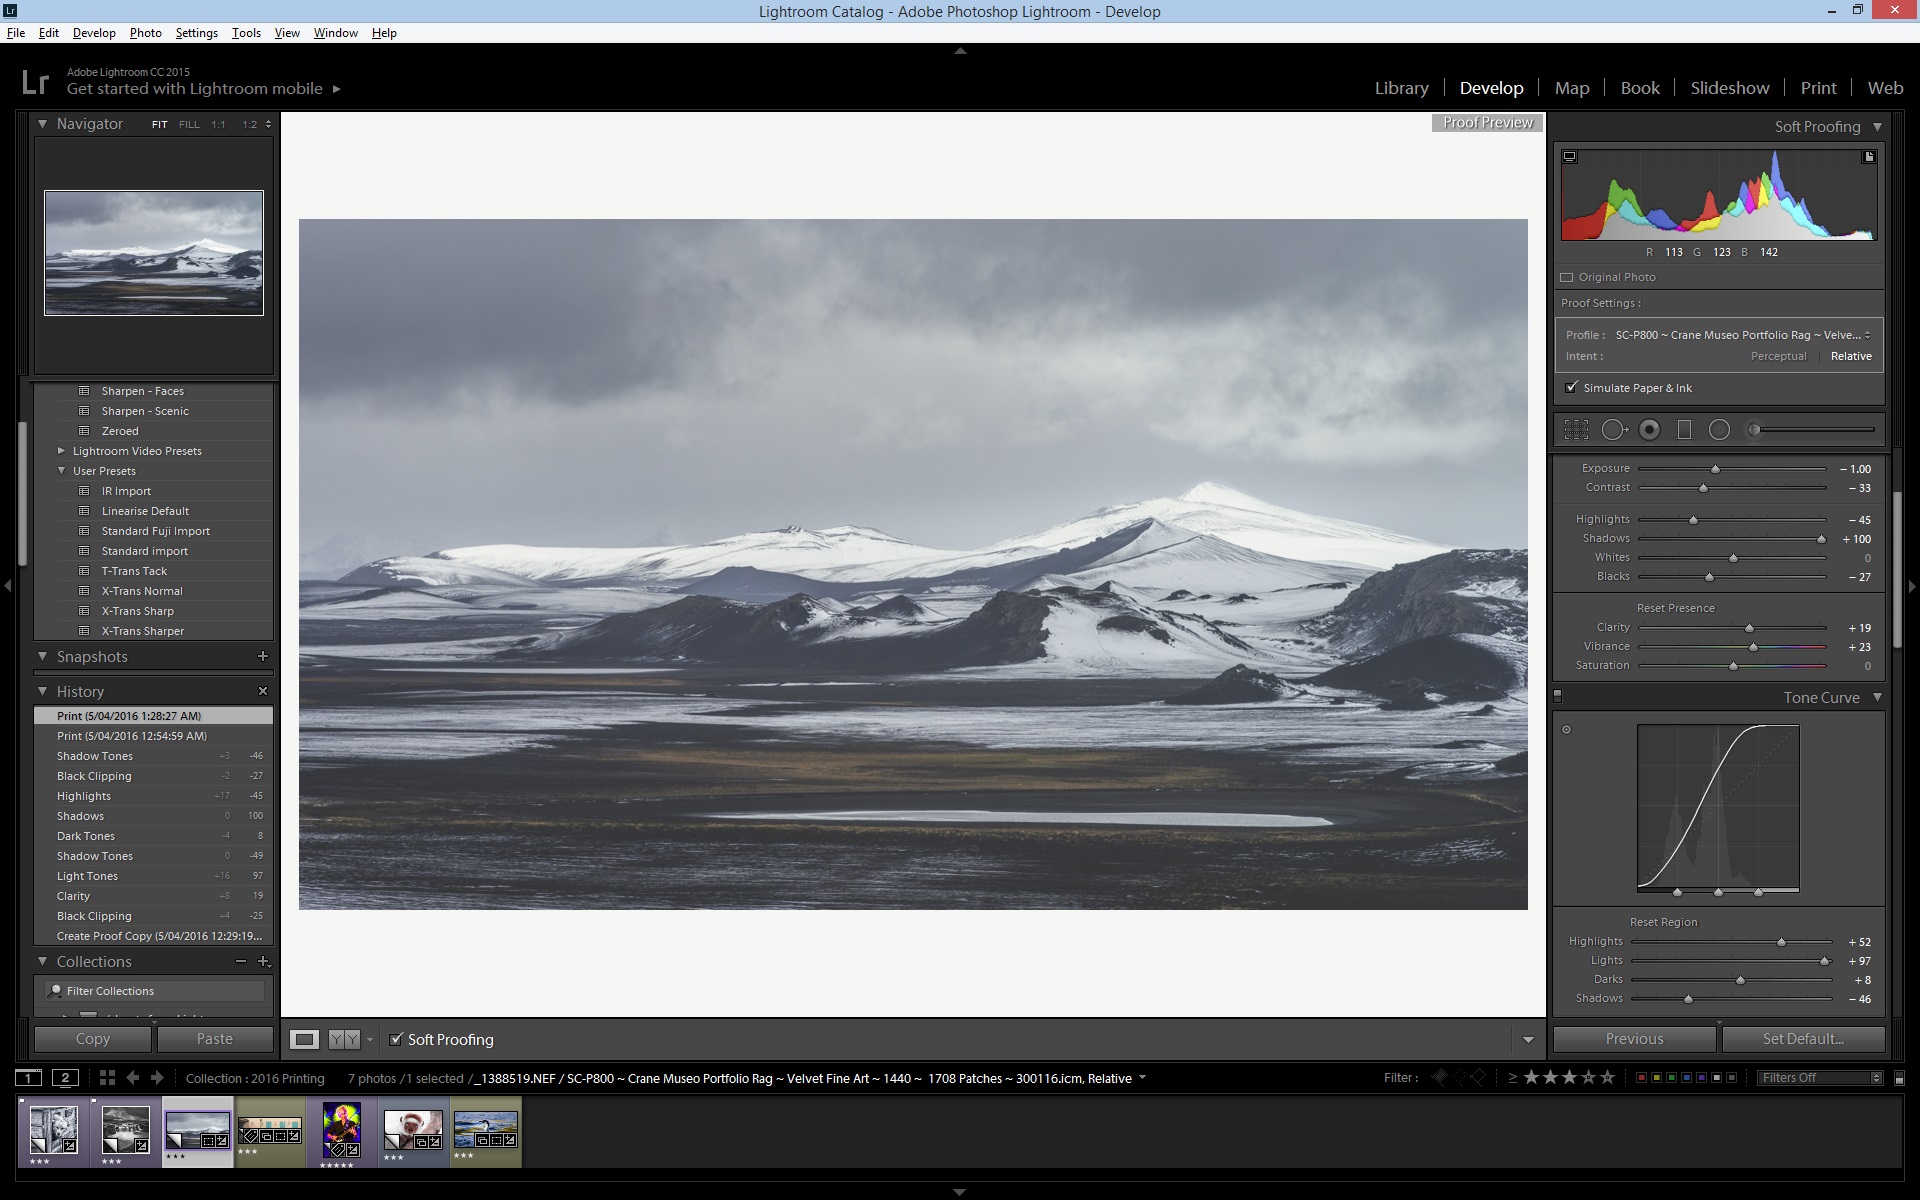
Here we have the Lightroom Develop screen with soft proofing turned on. You won’t be able to see much detail at this size though if you click on the image it expands in another screen to 1920×1200 pixels, which may be useful if you’re on a PC. In any case, I’ve also expanded key parts of the screen to talk about them.
.
 ..
..
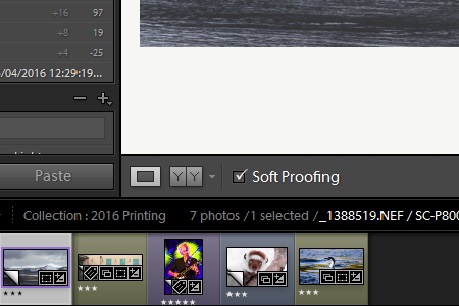
The first thing to do is to check the [Soft Proofing] checkbox, towards the bottom left of the Develop screen. Your image then displays as though a print against a white paper background. Lightroom adjusts the colours and densities to match that.
Just to the left of the [Soft Proofing] checkbox is a split box. Just to the left of that is a rectangle containing a darker rectangle. That button is active so that the overall screen at the top shows a single image, the image to be printed. Clicking on the split box splits the screen to show both how your unchanged image would look as a print and how it would look after you make some adjustments.
.
 ..
..
The next thing is go to the top right of the overall screen to specify the profile for the paper you intend to print from. This shows inside the box above. You select from a dropdown list and in this case it is a profile for a matte paper. In most cases this will be a generic paper profile from the manufacturer of the paper. It is possible to generate your own printer profile but for most people this will be overkill. If you’re printing on an Epson paper, that profile will come with the printer, though it’s always a good idea to check the US Epson site to see whether they have a newer and better profile there. If you’re printing on a non-Epson paper, you can download a profile for that paper from that manufacturer’s site.
Different papers can create quite different prints. Semigloss and particularly glossy papers can produce much darker black and brighter colours. Some glossy papers have a distinctive sheen and glossy papers can be easily damaged. Matte papers have a reduced tonal range and may be suitable for more subtle prints. I suggest starting off with one semigloss paper, perhaps later or also a matte. It may be better to develop a “feel” for the papers than perhaps initially confuse yourself with too much choice.
You can change the profile setting above through the dropdown to simulate how your print will look with different papers. If you have more than one paper available, that might help you to choose.
Below the profile setting is the Intent. You can choose Perceptual or Relative. Relative is usually the more likely choice. Perceptual may be more useful where you have bright colours that may be in danger of going out of gamut. The printer gamut is the set of colours and densities that the printer can accurately display. Relative keeps in-gamut colours accurate but clips out-of-gamut colours; Perceptual should work better with out-of-gamut colours but may distort in-gamut colours. You can try each to see which seems to work best for your image. Often it makes little difference.
[Simulate Paper and Ink] should be checked.
.
 . .
. .
It’s even possible to have an image that’s essentially impossible to print. This image from the 2013 Sydney Blues Festival looks as though it would print easily enough but the blue especially is so far out of the printer’s gamut that it comes out dull and murky and I couldn’t get it to work, even after repeated tests. Usually this is not a problem, only for a few images with very intense stage lighting or in some cases, flowers. It is possible to test for out of gamut areas in both Lightroom and Photoshop but Jeff Schewe advises that this feature is not accurate and not to use it. He says that he will recommend a method for Adobe to fix this in future versions. Therefore, I will not be covering that.
.
 ..
..
When the [Soft Proofing] checkbox is checked and you make a change to the image, the dialogue box above appears. I usually choose the far right option, which creates a virtual copy that retains all the changes you make to make the print. Creating a virtual copy means that Lightroom leaves your RAW file unchanged and creates another set of instructions to modify the image, stored in a sidecar file or the catalogue.
Lightroom is a non-destructive editor that records all your changes and allows you to reverse them. The image shown in the overall screen at the top is a modified soft proof. There is a History section at the bottom left of the screen which starts with the entry for creating a proof copy and shows all the changes I made to enhance the print. You can go back and click on that image if you want to see the History section in a larger view.
.
 ..
..
Using the usual Develop screen sliders, I made some changes to the proof copy to make it more suitable for printing. The slider positions above include those changes but also the changes to optimise the print before the soft proof. Such Develop settings can vary widely from image to image. In this case, I made small changes to a variety of settings including highlights, blacks, clarity, lights, darks and tone-curve shadows. Usually I will make much fewer changes and sometimes none at all. Even subtle changes can often make a difference though.
.
.
Print settings and presets
.
 .
.
.
We have soft-proofed to enhance our image for printing. We now go to the Print screen in Lightroom so we can print. What makes life much easier here is that you can save your settings for a particular paper and size, and then reuse that time after time. I’ll show you what those settings need to be and how to save them as a preset.
.
 .
.
.
First, in the Print Job section at bottom right of the Develop screen, under “Color Management”,we set the Profile and the Intent to the settings we used for soft proofing (in this case, Crane Museo Portfolio Rag and Relative). Draft mode printing is off. Print resolution is 360ppi for an Epson printer (and can even be 720ppi if your file size is not too small). Print sharpening I leave on at Standard. This is output sharpening and not something you can set by eye. Media Type should be glossy or matte according to the paper. This is so the sharpening works properly; matte papers need more output sharpening. Leave Print Adjustment off.
Now we could click the [Printer] button (on the Print screen above), set up Properties, and go through to print. But we’re not going to print yet, we’re first setting up a preset and any print setting we make will be lost if we exit out of the Print dialogue without printing. So instead we’ll click on the [Page Setup…] button at bottom left. The Epson [Print Setup] dialogue pops up. Next we click on [Properties]. This may appear slightly differently for different models of Epson printers.
.
 .
.
.
First we need to set the media type which here is here is Velvet Fine Art. You will find this setting in the documentation for your paper profile or you may even be using the Epson paper Velvet Fine Art. We can ignore the [Custom Settings…] and [Paper Config…] dialogues here.
Next, we’re printing colour so we choose “Color”.
Print Quality is “Quality” which here means 1440×770 dpi. If we were printing on a glossy or semigloss paper, we would probably choose “Max Quality” or 2880×1440 but there is no point for a matte paper. Different printer models may have different names for these terms.
Mode is “Off (No Color Adjustment)” because we are using colour management – printing with a profile from a profiled monitor.
Source is specific to the printer and the different choices you have for paper feed for different papers.
Size here is 13×19 in, or A3+.
Now we have finished with all our print settings so we click OK and return to the main screen to save the preset.
.
 .
.
.
To name and create a new print preset, we go to the top left of the Print screen and click the plus sign [+] to the right of the heading “Template Browser”. For example, there is one already there for “SC_P800 Crane Museo Portfolio Rag A3+”. Now each time you go to print on that paper on A3+, you can click on that preset and everything is set up. You don’t need to go through each time and carefully set those parameters. As well as making printing much quicker it greatly reduces the risk of a mistake.
Advanced Black and White
Many Epson printers have an “Advanced Black and White” mode. This gives deeper blacks and potentially better image quality for black and white prints. However, if you want a toned monochrome, you are probably better of printing colour as above, or you will have to set the toning by trial and error in a dialogue box.
There are two things you need to do to print in ABW mode. First, at the bottom right of the Print screen, where we set the profile of the paper, instead select “Managed by the Printer” from that dropdown.
Then we need to make a modification to printer properties (screen capture before last). You can get to the Printer Properties dialogue box through [Page Setup..] at the bottom left of the Print screen, if you are setting it there or defining a preset. Otherwise you clicking the [Printer…] button at bottom right of the Print screen and get to it on the way through to printing. In either case, instead of setting Color to [Color], set it to [Advanced B&W Photo]. That also changes the value for Mode to [Neutral] and makes an [Advanced] button appear.
.
 .
.
.
Clicking the [Advanced] button takes you to this screen. You can set toning by dragging the cursor round in the big colour wheel. The dialogue only shows you how the tone of that specific image of the young woman changes though, not the image you are trying to print. At the top, I always leave Color Toning to [Neutral] though other values are cool, warm and sepia and you can always click on those to see where the cursor goes in the colour wheel.
For the P800, I leave tone as [Dark]. I seem to recall the recommended setting was [Darker] for the 3800 and 3880. May be cause for experimentation and testing.
ABW isn’t colour managed to you can’t soft proof for it – though you can if you get a custom profile from Image Science (you won’t be able to roll your own here). This still won’t allow you to soft proof toning though.
.
.
Test prints
Having a calibrated monitor and creating a plausible soft proof will get you much of the way to a successful print. In some cases you’ll be able to print straight off the soft proof with no adjustments. In other cases you may need to put some time and effort into test prints to fine tune your final output. The soft proof is very useful but it can only take you so far. Prints have a texture, a physical presence and you’re looking at a reflected surface instead of the equivalent of a slide (i.e. a transparency film – do I need to say that for anyone?). And if you’re printing without colour management, you’re likely to expend much more paper and time and even then have less chance of “getting it right”.
Fortunately, Lightroom has some easy and powerful tools for generating test prints.
.
 .
.
.
Here we are using a 4×5 grid on A3+ paper to print out up to 20 test prints. This is a preset I created for just the arrangement of the grid. First I click on one of my A3+ presets for a specific paper, then I click on the preset for the grid. But if we look at the Print Job section at the lower right (as shown four screen captures up), we will see that [Draft Mode Printing] is checked. So we uncheck it and that reveals the paper type from the initial preset. I could have saved the grid preset with [Draft Mode Printing] unchecked but then it would have been for a specific paper. That would be a better option though if you use only one paper.
I made the grid preset by modifying the [4×5 Contact Sheet] preset provided with Lightroom.
.
 .
.
.
Starting from that preset, I checked [Rotate to Fit] so images rotate to fill the cell. Also, because the Lightroom preset was designed for an A4 sheet, there was too much space between the cells. I unchecked [Keep Square] towards the bottom and adjusted the Cell Height.
When printing out test prints, you’re usually going to want to make several passes on the same sheet of paper to print on all the squares. You can do this by adjusting the rows and columns. For example, suppose you want to start printing on the third row. I can see from the ruler to the left of the images that the top of this row starts at 19.5 cm. I change the number of rows in the Page Grid from 5 down to 3, and increase the Top Margin from 0.28cm to 19.5cm. (I can see the ruler because at the bottom of the screen above, I have the Guides checked, including the borders of the cells and the ruler at the sides.)
At the bottom of the Guides section, I have Dimensions turned off. When on, that shows the actual size your image will print at, as a small label at the top left of the image. This is just for the screen view and does not print. It is not relevant for test prints but very useful when you come to make the print, especially if you are printing for an existing matte.
.
 .
.
.
Further down the right side of the Print page, there’s another setting that can be useful for test prints. After checking the [Photo Info] checkbox, I’ve specified a label to occur below the images. Currently it’s set at Filename but there are various choices including Caption and Title. You might be printing a set of virtual copies of the same image with variations on a setting, say exposure. You might like to record abbreviated labels in either Caption or Title such as X +0.5, X +1.0, X +1.5, X +2.0. They would then print out below the image so you can be sure to identify the correct modification.
Finally, a general point. If your prints come out too dark and you have a calibrated monitor, then you may be calibrating to too high a brightness. Personally, I use 100 cd/m² for semigloss/ glossy papers and 90 cd/m² for matte. If your colorimeter can’t set the brightness, then you need a better colorimeter (or perhaps just the software for it, if you can upgrade that).
Printing
Right then, you’re ready to go to print, perhaps to print out some tests. It’s a good idea to first print out a nozzle check on plain A4 paper, particularly if you haven’t used the printer for a while (From the Print screen, [Printer] brings up the Epson Print Dialogue, then click [Properties], select the Utility tab and choose [Nozzle Check]).
To print you press [Printer] to bring up the Epson Print Dialogue. You may wish to click [Properties] to double-check your print settings. Then you press OK….
.
 .
.
.
Hopefully, after a few minutes, a wonderful print will emerge.
Further Reading
- Jeff Schewe: The Digital Print .
- Michael Reichmann and Jeff Schewe: Camera to Print and Screen . (video; requires $US12pa subscription)
Pingback: Computers for Photography « Murray Foote
Pingback: Technical Posts « Murray Foote
Pingback: Digital Photography « Murray Foote